In this chapter, we explore the demo scene and all the demo files included in this asset. This way, you’ll get to see an example of what can be achieved with this character creator. For an audio-visual explanation regarding the demo files, I also recommend you watch the video on the right.
Demo
Documentation: Pixel Character Creator 2D
Table of contents

2.1
Dependencies for the demo
To get the smoothest experience possible with the demo, the following dependencies are required:
Unity’s New Input System
Unity’s New Input System is used to handle the player’s inputs in the demo scene. If you’ve never worked with the New Input System before, don’t worry. For this demo, you won’t have to configure anything. All you have to do is download and import the New Input System from the package manager. Everything should work immediately afterward.
Assets made by Game Between The Lines
A handful of assets from the Game Between The Lines library are used in this demo to give you a good impression of what the Pixel Character Creator 2D is capable of:
- Basic Dialogue System (included with the demo)
- Basic Top Down NPC System (included with the demo)
- Basic Top Down Player System (included with the demo)
- Top Down Pixel Art Casino Tileset (included with the demo)
Important note: All of the aforementioned dependencies are solely needed for the demo and aren’t required when using the Pixel Character Creator 2D tool itself.
Layers and Tags
Automatic setup (recommended)
You can quickly set up the required layers, sorting layers, and tags by following the instructions below.
WARNING, this method will replace the current layers and tags you already set up. Only use this method if you’re planning to use this demo in a clean Unity Project:
- Go to Edit > Project Settings > Tags and Layers.
- With the Tags and Layers window opened, click on the “Select Preset” icon in the top right corner (between the question mark and the cogwheel). The button looks like this:

- Select TagAndLayerManager. You should now have all the required layers and tags.
Manual setup (may require fixing scene objects and prefabs)
Alternatively, you can view the image on the right and add the tags and layers manually. Please keep in mind that if you decide to add them manually, Sorting Layers for prefabs and scene objects may not be recognized instantly. This will require manual fixing, so it’s best to avoid using this method if possible.

Transparency Sort Mode
In order to render the 2D Tilemap Layers properly a quick adjustment needs to be made to the sort mode:
- Go to Edit > Project Settings. Then select the Graphics tab. Under the Camera Settings, there are two variables we are going to adjust.
- Change the Transparency Sort Mode to Custom Axis.
- Then, set the Transparency Sort Axis to match the one in the screenshot below.
2.2
Playing the demo scene
The demo scene can be found by navigating to PixelCharacterCreator2D / Demo / Demo_Scenes / TopDownDemoScene.unity.
With all the previously mentioned dependencies taken care of, this scene is now ready for playtesting.

Controls
Please view all the controls below so you can playtest the demo scene as fluently as possible.
Default Key Binding |
Usage |
Additional information |
| WASD | Walk / Run | The player can walk and run in 4 directions. |
| E | Interact | The player can interact with NPCs and objects like trash cans, slot machines, and closed doors. Interaction input will only be handled if the player is standing next to an ‘interactable entity’. |
| R | Toggle Run | The player can use a toggle to walk or run. This choice was made to prevent having to hold a key every time you want to quickly test something. Now you can keep running non-stop by just pressing R once. |
2.3
Practicing with the Pixel Character Creator 2D
Now that we’ve tested the demo scene and seen the characters in action, let’s create a new character.
Step 1.
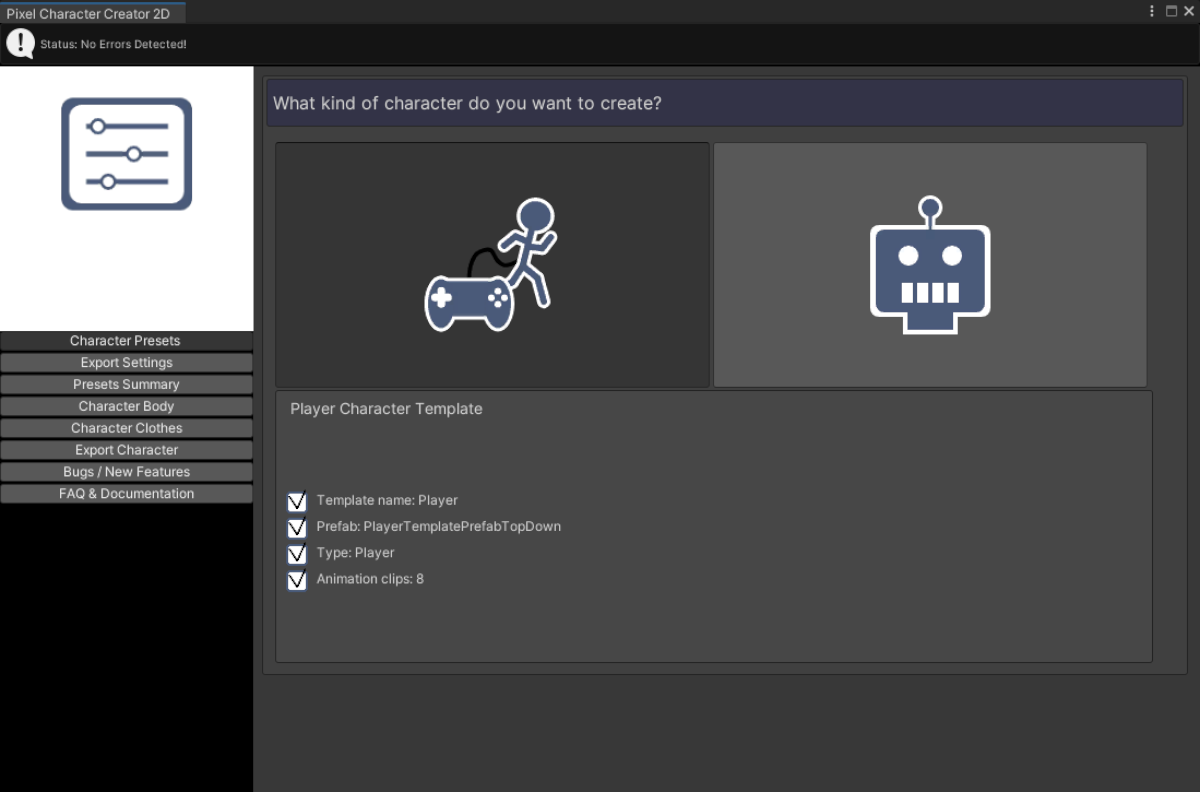
Open the PixelCharacterCreator2D.asset. In the Character Presets tab, select either the Player Character Template or the NPC Character Template. This will determine whether we’re creating a player or NPC. You’ll learn how to set this up yourself in Chapter 7.
Step 2.
I recommend keeping the Export Settings as they are unless you know what you’re doing. You’ll learn more about setting up all of these settings yourself in Chapter 7. If you want, you can toggle certain settings such as “Export Character as Prefab” and “Export Character Animations” on or off in case you, for instance, only want to export Sprite Sheets.
Step 3.
Navigate to the Presets Summary to review your choices. If you’re satisfied, name your character and click “Create new Character”. A character with your chosen name has now been created in the scene. Zoom in on the default character sprite so you can easily view the changes you’ll make.
Step 4.
Use the sliders in the Character Body tab to change the different body segments and their colors. In Chapter 7 you’ll learn how to add a custom body segment and colors to this tab.

Step 5.
Now do the same in the Character Clothes tab to change the clothing of your new character. Feel free to also tinker with the Randomize buttons near the bottom of the window.
Step 6.
Once you’re satisfied, navigate to the Export Character tab. If you find yourself wanting to change the name, you can do so here. You can also change the export path for the sprites, prefab, and animations if needed.

Step 7.
Click “Export the character as a new Player”. You’ve created a character!
Step 8.
Test your character in the demo scene and tinker with their settings in the Inspector Window.
2.4
Cross-asset features in the demo
The demo scene requires some of the free-to-use assets such as the Basic Dialogue System, Basic NPC system, and the Basic Player system. The compatibility between the Character Creator and those other assets provides you with a near-seamless demo. None of the other assets are required for using the Character Creator 2D itself, but since all of the assets mentioned in section 2.1 are free, I do recommend using them for testing purposes in this demo.


Refer to the body and clothes in dialogue
The Basic Dialogue System can be used together with the Basic NPC System and the Basic Player System to retrieve the character design data of either character, provided by the Character Creator 2D. This is how it works:
- If a character has the Character Data script attached to it, the Dialogue System will be able to detect it. Every time the design of the character is updated with the Character Creator 2D, all design information for that character is stored in this script, including all chosen segments and colors.
- A reference to a stored character segment or color can be made by placing the variable name in the Dialogue Initiator in a specific format. View these examples below:

-
- “Whoa, your hair is totally awesome! I believe that’s a {p_hairstyle}, isn’t it?” (p_hairstyle refers to the hairstyle of the player)
- “How’d you dye your hair {p_haircolor} like that?” (p_haircolor refers to the hair color of the player)
- “What do you think of my {npc_facialhaircolor} beard?” (npc_facialhaircolor refers to the facial hair color of the NPC the player is talking to)
- “I always request a {npc_facialhairstyle} style when I’m at my local barber.” (npc_facialhairstyle refers to the facial hairstyle of the NPC the player is talking to)
Below, you can view all default Dialogue Reference Tags that are included in this demo. These can be used to refer to the design of the player character or the NPC whom you initiated the conversation with. The references are recognized by the initial letters “p” (short for player) or “npc”. Do keep in mind that the tags below are case-sensitive. Open up the foldable sections to view all Dialogue Reference Tags.
Player Character Reference Tags
Player Reference Tags |
Refers to: |
Example in text |
| {Player} | Player name | “Oh hi, {player}. Long time no see!” |
| {p_bodystyle} | Player body style | “Does your body feel {p_bodystyle}?” |
| {p_bodycolor} | Player body color | “Are you doin’ okay there buddy? You look a bit {p_bodycolor}…” |
| {p_lipscolor} | Player lips color | “Is that a new color of lipgloss? Please tell me how I can get {p_lipscolor} lips as well!!!” |
| {p_eyescolor} | Player eyes color | “Is {p_eyescolor} your natural eye color or are you wearing contacts?” |
| {p_shoesstyle} | Player shoes style | “Nice shoes! What are those? {p_shoesstyle}?” |
| {p_shoescolor} | Player shoes color | “Not sure I like that {p_shoescolor} color, but I do like the shoes’ design.” |
| {p_pantsstyle} | Player pants style | “How come you’re wearing {p_pantsstyle} to the party? Was there a dress code?” |
| {p_pantscolor} | Player pants color | “The witness stated they saw a figure with {p_pantscolor} jeans. It just so happens you are wearing that color.” |
| {p_beltstyle} | Player belt style | “Oh hey, did you buy that {p_beltstyle} at the clothing store?” |
| {p_beltcolor} | Player belt color | “Told ya! A {p_beltcolor} belt works fine with the rest of your outfit!” |
| {p_upperclothingstyle} | Player upper clothing style | “A {p_upperclothingstyle}, eh? Looks like someone is going somewhere special tonight.” |
| {p_upperclothingcolor} | Player upper clothing color | “{p_upperclothingcolor} just so happens to be my favorite color, which means you’re in luck.” |
| {p_facialhairstyle} | Player facial hair style | “I’m not sure whether I like you better with or without that {p_facialhairstyle}…” |
| {p_facialhaircolor} | Player facial hair color | “That {p_facialhaircolor} facial hair of yours does make you look a bit older.” |
| {p_hairstyle} | Player hair style | “Oh my, your hair looks lovely! What’s that style called again? {p_hairstyle}, am I right?” |
| {p_haircolor} | Player hair color | “That’s a nice hair color! {p_haircolor}, suits you a lot.” |
| {p_headwearstyle} | Player headwear style | “That’s a cool {p_headwearstyle}. where can I buy one?!” |
| {p_headwearcolor} | Player headwear color | “That {p_headwearcolor} color complements the rest of your outfit very well!” |
Player Character Reference Tags
Refer to: |
Reference Tag Example |
| Player name | “Oh hi, {player}. Long time no see!” |
| Player body style | “Does your body feel {p_bodystyle}?” |
| Player body color | “Are you doin’ okay there buddy? You look a bit {p_bodycolor}…” |
| Player lips color | “Is that a new color of lipgloss? Please tell me how I can get {p_lipscolor} lips as well!!!” |
| Player eyes color | “Is {p_eyescolor} your natural eye color or are you wearing contacts?” |
| Player shoes style | “Nice shoes! What are those? {p_shoesstyle}?” |
| Player shoes color | “Not sure I like that {p_shoescolor} color, but I do like the shoes’ design.” |
| Player pants style | “How come you’re wearing {p_pantsstyle} to the party? Was there a dress code?” |
| Player pants color | “The witness stated they saw a figure with {p_pantscolor} jeans. It just so happens you are wearing that color.” |
| Player belt style | “Oh hey, did you buy that {p_beltstyle} at the clothing store?” |
| Player belt color | “Told ya! A {p_beltcolor} belt works fine with the rest of your outfit!” |
| Player upper clothing style |
“A {p_upperclothingstyle}, eh? Looks like someone is going somewhere special tonight.” |
| Player upper clothing color |
“{p_upperclothingcolor} just so happens to be my favorite color, which means you’re in luck.” |
| Player facial hair style |
“I’m not sure whether I like you better with or without that {p_facialhairstyle}…” |
| Player facial hair color |
“That {p_facialhaircolor} facial hair of yours does make you look a bit older.” |
| Player hair style | “Oh my, your hair looks lovely! What’s that style called again? {p_hairstyle}, am I right?” |
| Player hair color | “That’s a nice hair color! {p_haircolor}, suits you a lot.” |
| Player headwear style | “That’s a cool {p_headwearstyle}. where can I buy one?!” |
| Player headwear color | “That {p_headwearcolor} color complements the rest of your outfit very well!” |
NPC Character Reference Tags
NPC Reference Tags |
Refers to: |
Example in text |
| {npc} | NPC name | “My name is {npc}. Nice to meet you!” |
| {npc_bodystyle} | NPC body style | “My body feels {npc_bodystyle}…” |
| {npc_bodycolor} | NPC body color | “I was hoping to get a tan today, but now I’m all {npc_bodycolor} instead…” |
| {npc_lipscolor} | NPC lips color | “Read my {npc_lipscolor} lips … I won’t do it!” |
| {npc_eyescolor} | NPC eyes color | “Do you think the {npc_eyescolor} contacts I’m wearing are… too much? ” |
| {npc_shoesstyle} | NPC shoes style | “We require you to wear special shoes, like the {npc_shoesstyle} I’m wearing.” |
| {npc_shoescolor} | NPC shoes color | “Now look what you’ve done! My beautiful {npc_shoescolor} shoes… RUINED!” |
| {npc_pantsstyle} | NPC pants style | “I used to hate wearing {npc_pantsstyle}, but I’ve grown accustomed to them.” |
| {npc_pantscolor} | NPC pants color | “But I am wearing {npc_pantscolor} jeans as well. Maybe the witness was talking about me…” |
| {npc_beltstyle} | NPC belt style | “I am wearing a {npc_beltstyle} to avoid losing my pants during my daily stroll.” |
| {npc_beltcolor} | NPC belt color | “When it comes to belts, I usually only wear {npc_beltcolor} ones. Don’t ask me why!” |
| {npc_upperclothingstyle} | NPC upper clothing style | “Do you think this {npc_upperclothingstyle} makes me look fat?” |
| {npc_upperclothingcolor} | NPC upper clothing color | “I always wear the same {npc_upperclothingcolor} clothes. I can’t help myself. It’s just too comfy…” |
| {npc_facialhairstyle} | NPC facial hair style | “I just can’t seem to grow a proper {npc_facialhairstyle}… Thanks, genes…” |
| {npc_facialhaircolor} | NPC facial hair color | “Yarr landlubber, you may call me Captain {npc_facialhaircolor} beard! You’d better compliment me, lest ye be prepared to walk the plank.” |
| {npc_hairstyle} | NPC hair style | “Do you like my hair like this? It’s called a {npc_hairstyle}!” |
| {npc_haircolor} | NPC hair color | “I like to dye my hair {npc_haircolor} every once in a while.” |
| {npc_headwearstyle} | NPC headwear style | “How do you like my {npc_headwearstyle}? I just bought it the other day.” |
| {npc_headwearcolor} | NPC headwear color | “What do you think of this hat? Is it too {npc_headwearcolor}? Be honest!” |
NPC Character Reference Tags
Refer to: |
Reference Tag Example |
| NPC name | “My name is {npc}. Nice to meet you!” |
| NPC body style | “My body feels {npc_bodystyle}…” |
| NPC body color | “I was hoping to get a tan today, but now I’m all {npc_bodycolor} instead…” |
| NPC lips color | “Read my {npc_lipscolor} lips … I won’t do it!” |
| NPC eyes color | “Do you think the {npc_eyescolor} contacts I’m wearing are… too much? ” |
| NPC shoes style | “We require you to wear special shoes, like the {npc_shoesstyle} I’m wearing.” |
| NPC shoes color | “Now look what you’ve done! My beautiful {npc_shoescolor} shoes… RUINED!” |
| NPC pants style | “I used to hate wearing {npc_pantsstyle}, but I’ve grown accustomed to them.” |
| NPC pants color | “But I am wearing {npc_pantscolor} jeans as well. Maybe the witness was talking about me…” |
| NPC belt style | “I am wearing a {npc_beltstyle} to avoid losing my pants during my daily stroll.” |
| NPC belt color | “When it comes to belts, I usually only wear {npc_beltcolor} ones. Don’t ask me why!” |
| NPC upper clothing style | “Do you think this {npc_upperclothingstyle} makes me look fat?” |
| NPC upper clothing color | “I always wear the same {npc_upperclothingcolor} clothes. I can’t help myself. It’s just too comfy…” |
| NPC facial hair style | “I just can’t seem to grow a proper {npc_facialhairstyle}… Thanks, genes…” |
| NPC facial hair color | “Yarr landlubber, you may call me Captain {npc_facialhaircolor} beard! You’d better compliment me, lest ye be prepared to walk the plank.” |
| NPC hair style | “Do you like my hair like this? It’s called a {npc_hairstyle}!” |
| NPC hair color | “I like to dye my hair {npc_haircolor} every once in a while.” |
| NPC headwear style | “How do you like my {npc_headwearstyle}? I just bought it the other day.” |
| NPC headwear color | “What do you think of this hat? Is it too {npc_headwearcolor}? Be honest!” |

Check a character for a specific design feature
The Character Data script exposes a lot of information in the inspector. All of the data in this inspector can be accessed by other scripts. This makes it easy to check if a character meets certain criteria. A simple example of this could be that you’re only allowed to enter a lab room with clothing that’s suited for your safety, such as Safety Goggles and a Lab Coat. You could make an NPC check if the player is wearing these items and allow passage if this variable returns true.